

Accurate.Video Edit is a powerful web based editing tool that will let your creativity do the talking while you create frame accurate edits with ease.
Edit is the perfect tool to generate subclips for marketing purposes, and thanks to its flexibility and comprehensive proxy workflow you will get up and running in no time. This is the user guide for Accurate.Video Edit.
Note that all features and functions described in this guide may not be included in the version you are currently using.
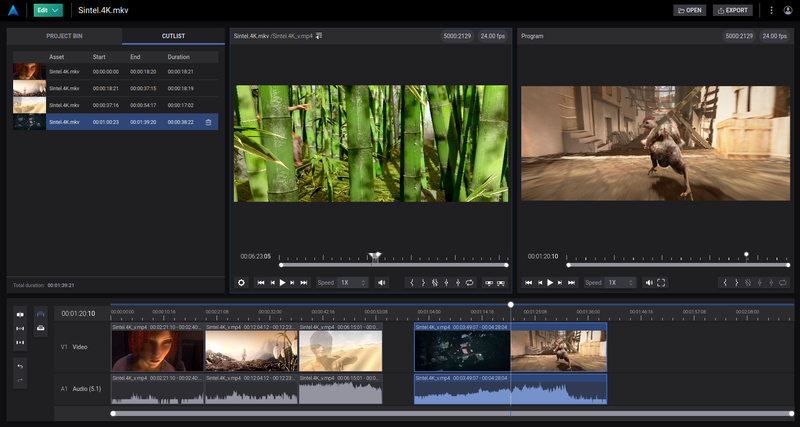
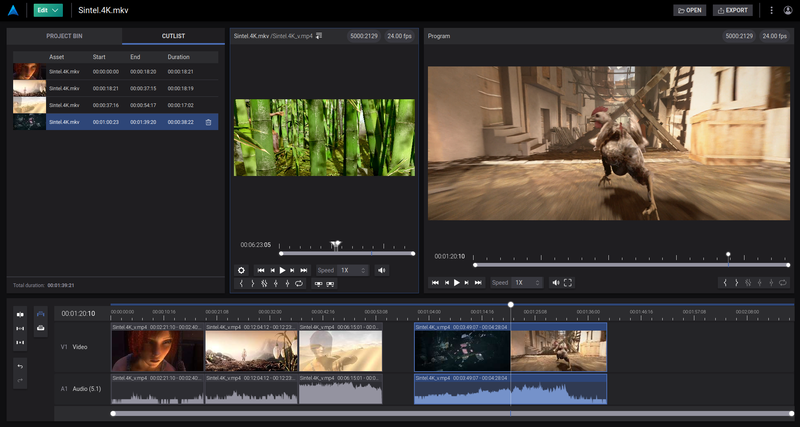
Just like many of the most popular editing applications, Accurate.Video Edit has a standard layout with two players; a source player on the left and a program player on the right.
From the source player you can add segments to the program timeline and then trim and edit them further. The program timeline is also reflected beneath the program player. Read more about the source player, program timeline and program player below.
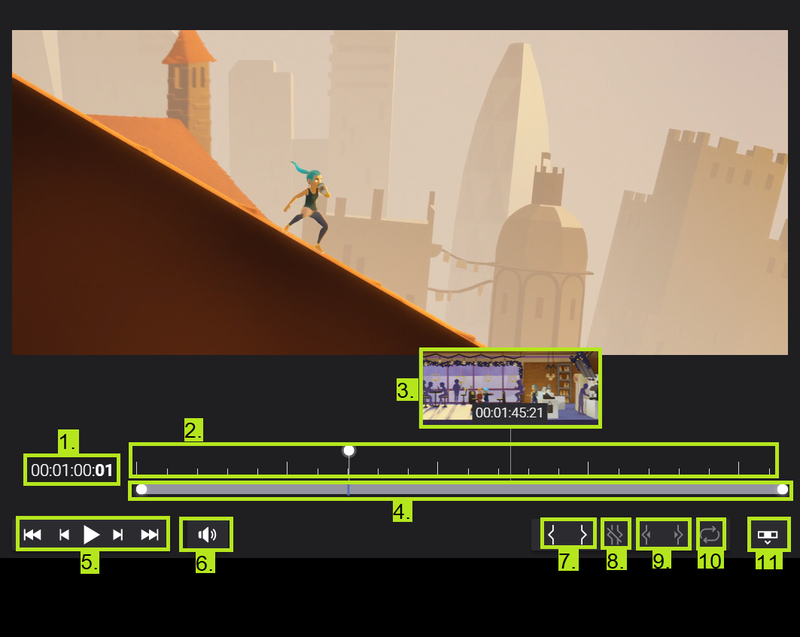
The source player is a user-friendly video player with all the functionality you can ask for. It is based on Accurate.Video’s critically acclaimed frame accurate video player. Here you can view the source material and do the following:
Also note there are extensive hotkeys for all buttons and functions.
With the source player you create an in point where the segment should start and an out point where the segment should end. With the help of all the functions mentioned above it is very easy to create a segment. Keep in mind that your segment does not have to be perfect at this stage, as you can trim and edit your segments with high precision after it has been added to the program timeline by double clicking on the segment.
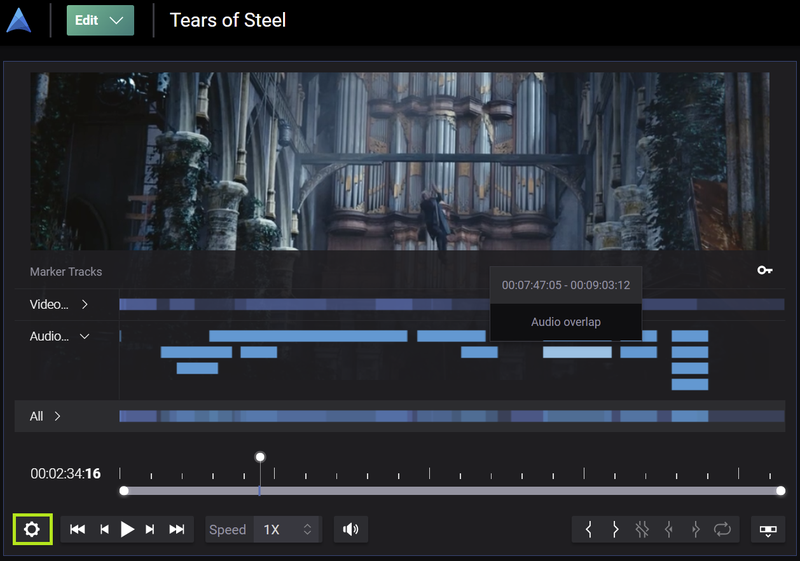
With the source player you also have the ability to visualize timecoded metadata as markers. Markers is a great way to highlight different portions of the video. Clicking the cogwheel icon highlighted in the image below lets you decide what marker tracks to show, and hovering the cursor over a specific marker gives you information about the marker:
All the segments that you gather from the source player appear on the program timeline. Here you have a perfect overview of everything you have collected from the source player, and here you can trim your segments and add gaps between them with the click of a button and much more.
It has never been easier to remove bars, slates and tones, intros, end credits or black frames. On the program timeline you can do the following:

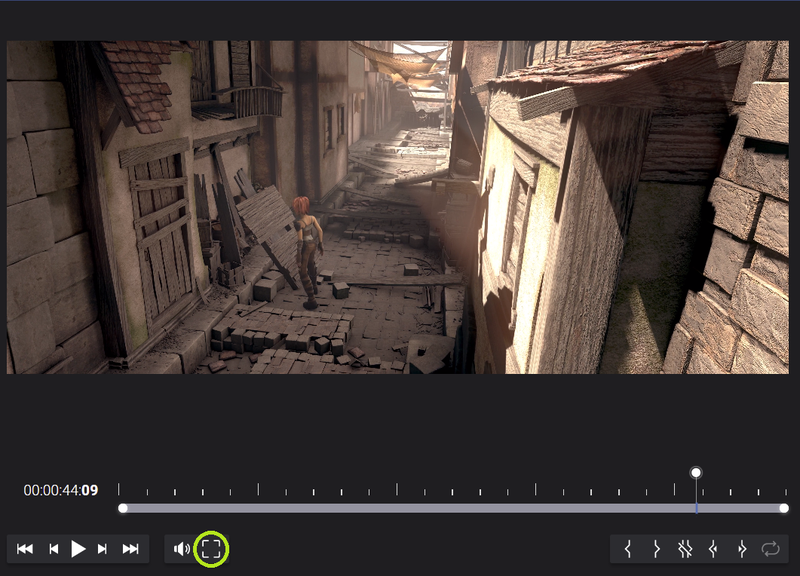
Everything that you do and edit on the program timeline updates the program player, as the program player acts as a preview of the finished edit. The program player has all the functions that the source player has, with the addition to also have the ability to view your work in fullscreen (see highlighted fullscreen button on image below).
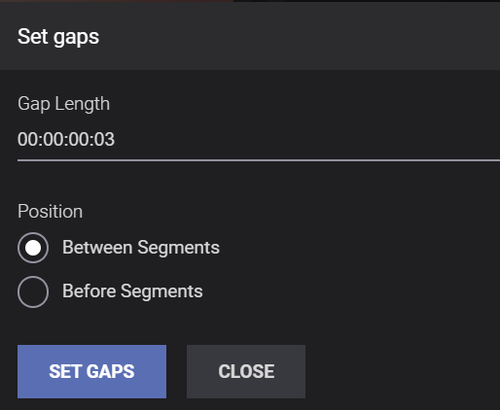
When you click on the “Set gaps” button, a modal opens up that lets you decide exactly what you want to do with your gaps universally. Here you can decide how long the gaps should be, and also if you want the gaps to appear before each segment or in between them.
When you are ready to apply your gaps settings, the next step is to click on the “Set gaps” button within the modal as shown on the image below. By doing so the modal closes and gaps are added to the program timeline instantly. You can also set gaps manually by dragging the segments to new positions. All your gaps will be visible in the program player when you play the video.
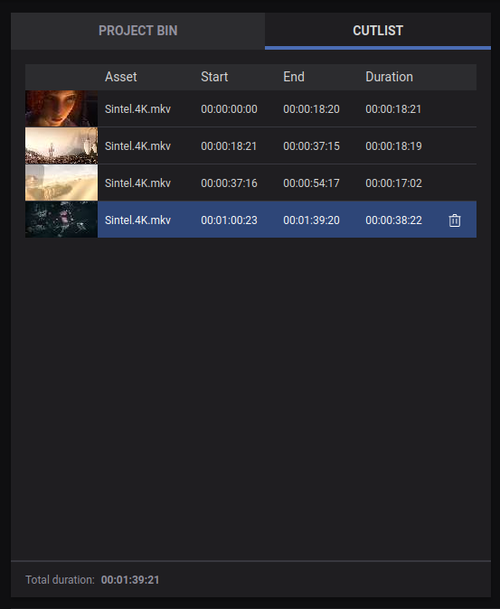
The cutlist is always present and gives you a perfect and dynamic table overview of all the segments you have added to the program timeline. Here you can see the start time, end time and duration of each segment and also the total duration for all segments combined.
All changes you do on individual segments on the program timeline updates the cutlist instantly.
On the cutlist you can also delete your segments by clicking on them separately or hovering over them and then click on the trashcan icon.
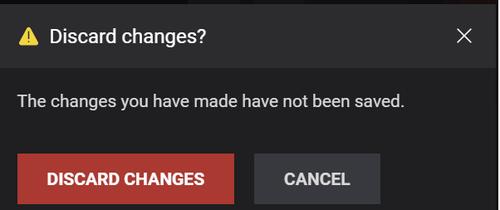
After or during each session you have the ability to save your work or discard your changes. At the top of Edit you will find a “Save” button, and here you can save all the work you have done in your current session. If you try to leave the application without saving you will be prompted to decide if you want to discard your work or cancel your action.
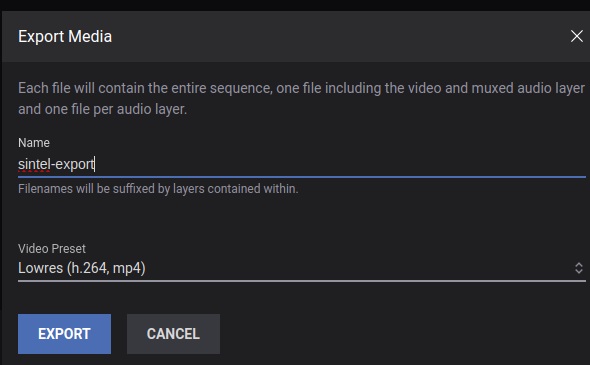
When you are finished with your edits it is time to export it. The export modal opens when you click on the “Export” button at the top of Edit. Here you provide a name for your export and a preset to use.
All the functions on Edit have a dedicated and well thought through hotkeys. If you click on the “more options” button next to the user icon at the top of Edit you can open up a list of all the available hotkeys. You can also see hotkeys for individual buttons etc if you hover over them with your mouse.
You can toggle focus between panels by clicking on them (or using hotkey) to make sure that the hotkeys you use are triggered on the right panel.

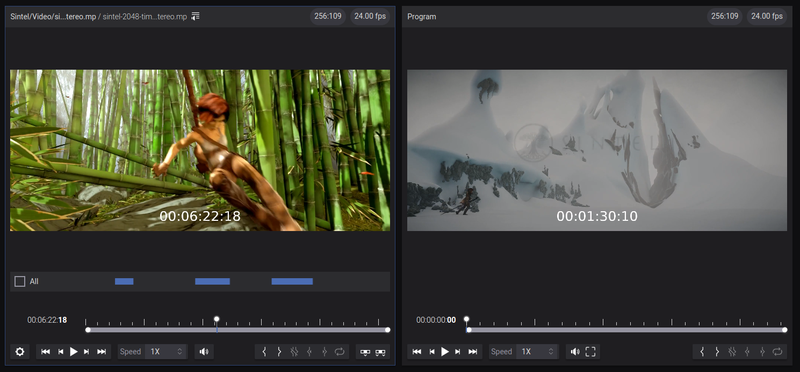
With A.V Edit you can customize the different panels of the application to better suit your personal workflow. Drag the timeline panel up and down to find your own preferred view. The two separate player panels can also be adjusted to a different size to make certain elements more visible.
Notice on the image above that the program player panel has been increased to gain more focus. All panels are adjustable by simply dragging the borders.
The loop function is very convenient if you want to review a specific portion of your video. With A.V Edit you can create your own loop in the easiest way possible by creating an inpoint where the loop should start and an outpoint where the loop should end. After the points are set you activate the loop function with the “Loop” button or hotkey “r”. The loop function is implemented on both the source player and the program player.
The playback loops you create are dynamic and can be changed at any time by dragging the in and out points, even when the video is playing. Click on the loop button again (or hotkey “r”) to end the loop. You can also remove the in and out points to stop the loop.
In A.V Edit you can decide if you want full thumbnail coverage on the program timeline or only show a part of the actual thumbnail for each segment. If you click on the user icon in the top right corner and then “Preferences” and “Edit” you will notice a toggle for this. Simply toggle the setting on/off to get the thumbnail setting you prefer for your workflow.
